
기본적인 데이터 전달 방식
1. GET + Query Parameter(=Query String)
일부 서버에서 GET 방식의 데이터 요청은 Body값을 처리하지 않기 때문에 쿼리 파라미터로 전달해야 한다.
response.getWriter().write() : 응답의 Body 값에 접근할 수 있어서 @ResponseBody를 대체할 수 있다.
http://localhost:8080/request-params?key1=value1&key2=value2@Slf4j
@Controller
public class RequestParamController {
@GetMapping("/request-params")
public void params(
HttpServletRequest request,
HttpServletResponse response
) throws IOException {
String key1Value = request.getParameter("key1");
String key2Value = request.getParameter("key2");
log.info("key1Value={}, key2Value={}", key1Value, key2Value);
response.getWriter().write("success");
}
}
2. POST + HTML Form(x-www-form-urlencoded)
HTTP Request Body에 쿼리 파라미터 형태로 전달하는 방법으로 폼 데이터를 서버에 전송할 때 사용하는 방식이다.
Controller 코드는 GET method와 동일하다.
POST /form-data
content-type: application/x-www-form-urlencoded

key1=value1&key2=value2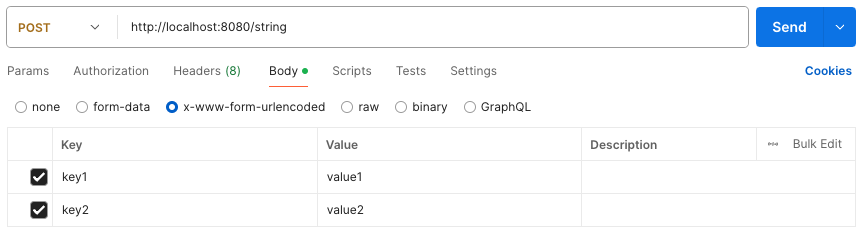
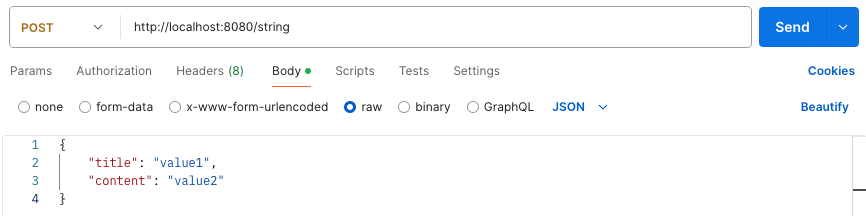
3. POST + HTTP Request Body
데이터(JSON, TEXT, XML 등)를 직접 HTTP Message Body에 담아서 전달한다.
주로 @RestController에서 사용하며, 대부분 JSON 형식으로 데이터를 전달한다.
@Slf4j
@Controller
public class RequestBodyController {

    // JSON을 객체로 변환해주는 Jackson 라이브러리
    private ObjectMapper objectMapper = new ObjectMapper();

    @PostMapping("/request-body")
    public void requestBody(
            HttpServletRequest request,
            HttpServletResponse response
    ) throws IOException {

        ServletInputStream inputStream = request.getInputStream();
        String messageBody = StreamUtils.copyToString(inputStream, StandardCharsets.UTF_8);

        log.info("messageBody={}", messageBody);

        Board board = objectMapper.readValue(messageBody, Board.class);

        log.info("board.getTitle()={}, board.getContent()={}", board.getTitle(), board.getContent());

        response.getWriter().write("success");

    }

}
어노테이션 기반 전달 방식
1. @RequestParam
- 쿼리 파라미터 or 폼 데이터를 통해 데이터를 전달하는 경우, 요청 파라미터의 각 속성값을 필드에 담아 처리하는 방식이다.
- @RequestParam : 파라미터 key값과 변수 이름이 동일하면 자동 바인딩
- @RequestParam("key") 해당 속성값을 변수에 저장
- @RequestParam 어노테이션을 생략해도 동작하지만, 요청 파라미터의 값을 바인딩하는 코드임을 이해하기 어렵기 때문에 권장 X
@Slf4j
@Controller
public class RequestParamControllerV2 {

	@ResponseBody
	@GetMapping("/v1/request-param")
	public String requestParamV1 (
					@RequestParam("name") String userName,
					@RequestParam("age") int userAge
	) {
		// logic
		log.info("name={}", userName);
    log.info("age={}", userAge);
		return "success";
	}

}
- required 속성
- default = true
- int 타입에는 null이 올 수 없으므로, 속성값이 false여도 age가 파라미터에서 생략되면 500 error가 발생한다.
- int가 아닌 Integer를 사용해야 (required=false)가 의도대로 적용된다.
@ResponseBody
@GetMapping("/v4/request-param")
public String requestParam (
                @RequestParam(required = true) String name, // 필수
                @RequestParam(required = false) int age,  // 필수가 아님 -> 에러
                @RequestParam(required = false) Integer age2 // 필수가 아님
) {
	// logic
	log.info("name={}", name);
  log.info("age={}", age);
	return "success";
}
- defaultValue 속성
- 해당 파라미터가 전달되지 않으면 설정한 기본값 적용
- `http://localhost:8080/v5/request-param?name&age` 처럼 value값만 지정하지 않아도 defaultValue 적용됨
@ResponseBody
@GetMapping("/v5/request-param")
public String requestParam (
    @RequestParam(required = true, defaultValue = "sparta") String name,
    @RequestParam(required = false, defaultValue = "1") int age
) {
    // logic
    log.info("name={}", name);
    log.info("age={}", age);
    return "success"
}
- Map 사용
@ResponseBody
@GetMapping("/v6/request-param")
public String requestParamV6(
        @RequestParam Map<String, String> map
) {
    // logic
    log.info("name={}", map.get("name"));
    log.info("age={}", map.get("age"));

    return "success";
}
- MultiValueMap 사용
- key=[value1, value2]
- 잘 사용하진 않음
- ex : `http://localhost:8080/v6/request-param?name=sparta&name=wonuk&name=tutor&age=100`
@ResponseBody
@GetMapping("/v6/request-param")
public String requestParamV6(
        @RequestParam MultiValueMap<String, String> map
) {
    // logic
    log.info("name={}", map.get("name"));
    log.info("age={}", map.get("age"));

    return "success";
}
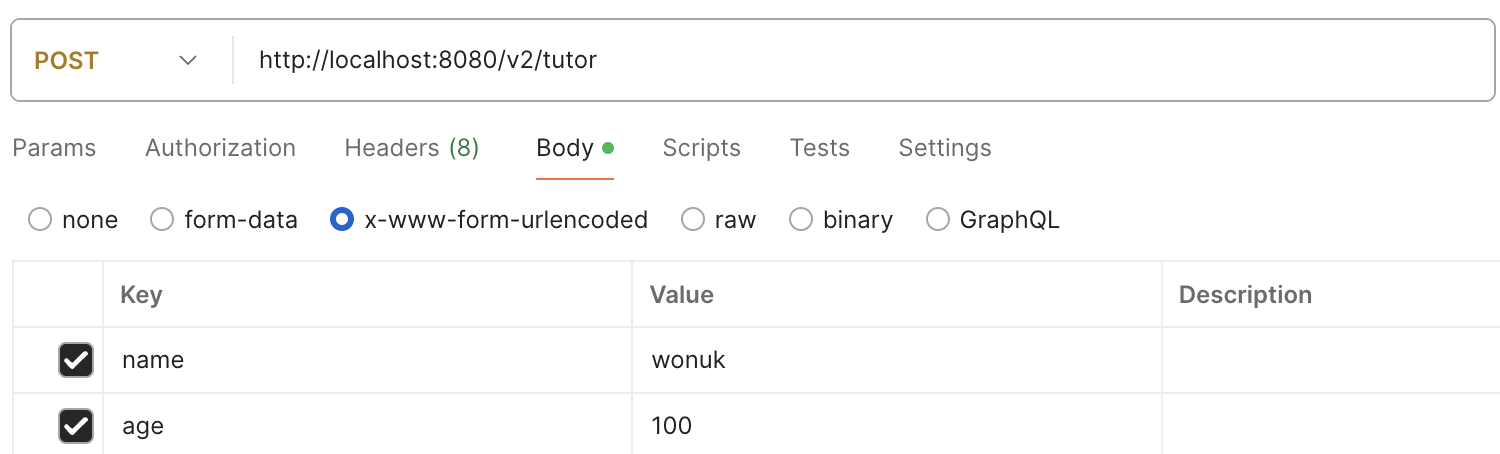
2. @ModelAttribute
- 쿼리 파라미터 or 폼 데이터를 통해 데이터를 전달하는 경우, 전달된 데이터를 객체로 처리할 때 사용하는 방식이다.
- 자동으로 해당 객체를 생성한다.
- 요청 파라미터의 key값으로 객체 필드의 setter를 호출해서 바인딩한다. (필드 이름과 파라미터 이름이 같아야 함)
- 요청 파라미터 속성값의 데이터 타입과 필드의 타입이 일치하지 않으면 BindException 발생한다.
- @ModelAttribute 어노테이션을 생략 가능하지만 @RequestParam과 마찬가지로 권장 X
@ResponseBody
@PostMapping("/v2/tutor")
public String modelAttributeV2(
            @ModelAttribute Tutor tutor
    ) {
    String name = tutor.getName();
    int age = tutor.getAge();

    return "tutor name = " + name + " age = " + age;
}
만약 @RequestParam과 @MoelAttribute 둘 다 생략한 경우,
파라미터가 String, int, Integer와 같은 기본 타입은 @RequestParam과 바인딩하고,
파라미터가 클래스(객체)인 경우는 @ModelAttribute와 바인딩한다.
3. POST + @RequestBody, @ResponseBody
- Body에서 데이터를 전달할 때 사용
- HttpMessageConverter가 Body 데이터를 String이나 Object로 매핑해서 동작
- @RequestBody : 요청 메세지 Body 데이터를 조회
- @RequestHeader : 요청 메세지 헤더 정보 조회
- @ResponseBody : 응답 메세지 Body에 값을 담아 전달
- @RequestBody를 생략하면 @ModelAttribute로 인식하므로 생략 불가
// text 타입 데이터 전달 시 코드

@Controller // @RestController = @Controller + @ResponseBody
public class RequestBodyStringController {

  @ResponseBody
  @PostMapping("/v5/request-body-text")
  public String requestBodyTextV5(
          @RequestBody String body,
          @RequestHeader HttpHeaders headers
  ) {
      // HttpMessageConverter가 동작해서 아래 코드가 동작하게됨
      String bodyMessage = body;

      return "request header = " + headers + " response body = " + bodyMessage;
  }
}
// JSON 타입 데이터 전달 시 사용
@RestController
public class JsonController {
@PostMapping("/v3/request-body-json")
public String requestBodyJsonV3(@RequestBody Tutor tutor) {
Tutor requestBodyTutor = tutor;
return "tutor = " + requestBodyTutor;
}
}
HttpMessageConverter 역할
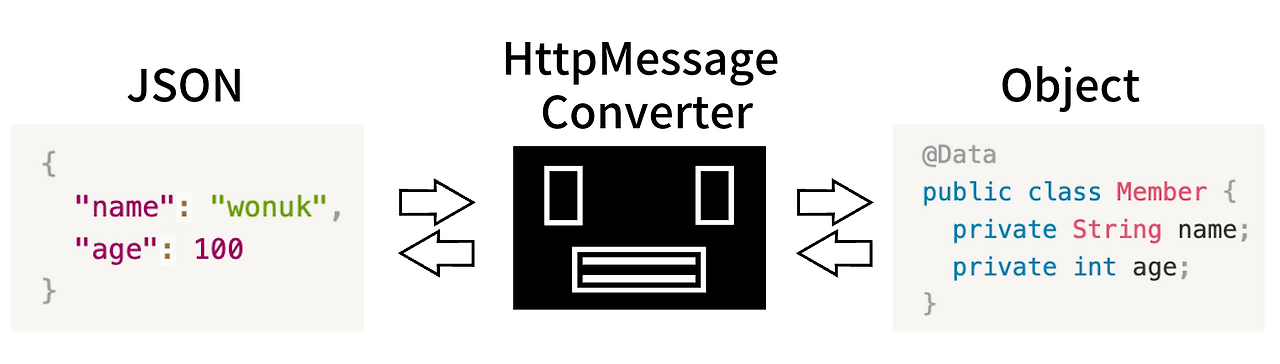
@RequestBody 동작 시,
- 요청한 데이터와 요청 헤더의 Content-Type 을 참고해서 어떤 Converter를 적용할지 결정
- ex. Content-Type: application/json -> MappingJackson2HttpMessageConverter
- Converter가 정해진 타입으로 데이터를 변환
- MappingJackson2HttpMessageConverter : Object로 변환
- HttpMessageConverter : String으로 변환
@ResponseBody 동작 시,
- 응답할 데이터와 요청 헤더의 Accept 를 참고해서 어떤 Converter를 적용할지 결정
- ex. Accept: application/json -> MappingJackson2HttpMessageConverter
- Converter가 정해진 타입으로 데이터를 변환
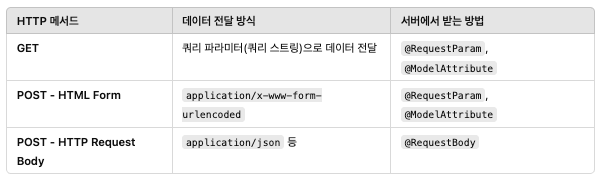
Client에서 Server로 Data를 전달하는 방법 정리
1. GET
쿼리 파라미터(쿼리 스트링)으로 데이터 전달
@RequestParam, @ModelAttribute
2. POST - HTML Form
@RequestParam, @ModelAttribute
3. POST - HTTP Request Body
@RequestBody
'언어, 프레임워크 > Spring' 카테고리의 다른 글
| Spring Boot의 예외처리 (유효성 검사) (0) | 2025.03.20 |
|---|---|
| 응답(Response) 데이터 전달 방식 (0) | 2025.03.20 |
| Spring Annotation (+Request Mapping) (0) | 2025.03.19 |
| Spring MVC (0) | 2025.03.19 |
| WAS / Servlet / SSR, CSR (0) | 2025.03.19 |